

-

I wanted to make a Mother's Day Card that was fairly easy to make and still really beautiful. I came across this image on pinterest and so I decided to model my card after this design. If you have some colored paper and a blank card lying around you can easily make this in about 1-2 hours.

You will need:
- Colored Paper
- Blank Card + Envelope
- Ribbon (or make one with paper)
- Pen
- Pencil
- Scissors
- Glue Stick
- Hot Glue Gun (for ribbon)
Step 1: Sketch out some leaves, flowers and a banner
Step 2: Cut your shapes out
Step 3: Tie your ribbon in a small bow and cut the remaining part at an angle
Step 4: Write out "Happy Mothers Day" on the banner you cut out
Step 5: Add paste to your shapes
Step 6: Place the shapes onto your blank card
Step 7: Hot glue your ribbon on to the card
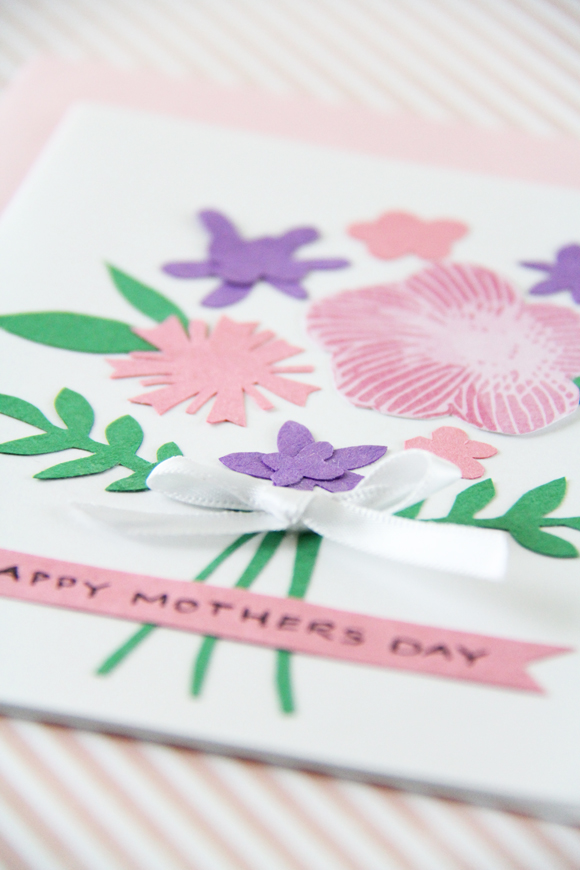


When you are all finished you should have something like this! Feel free to get creative and use your own colors and flower types. Would love to see yours if you decide to make one. Use @lovelyclusters in your photos on instagram and twitter. Have fun! :)
Follow Lovely Clusters On:
Pinterest | Twitter | Instagram | Subscribe -

My current mood is Spring in green and pink. So nice to walk outside and see these colors. Here are some of my faves from Etsy!
Top: LeChaim | EshaNewYork
Bottom: LittleCreekCreative | AngieMcCullagh
Follow Lovely Clusters On:
Pinterest | Twitter | Instagram | Subscribe -

I am loving the look of soft pretty pink with gold on these gorgeous pieces of jewelry. Which one is your favorite?
Top: BelindaSaville | emijewels
Bottom: WildPeopleFreeSpirit | DavieandChiyo
Follow Lovely Clusters On:
Pinterest | Twitter | Instagram | Subscribe -

It's been so warm here in Oregon and so I wanted to change my iphone background to something more summery and refreshing. I couldn't find an ocean wallpaper background that I liked so I decided to make one. Here are some images you can download to make your computer, phone, or tablet pretty! I hope you enjoy them. :)

* ALL FILES AND PRINTS ARE FOR PERSONAL USE ONLY *
Follow Lovely Clusters On:
Pinterest | Twitter | Instagram | Subscribe -
 Spring Paper Flower Garland from Lia Griffith
 Faux Brass Drawer Fronts from Sugar & Cloth
 Dip Dyed Photo Backdrop from Style Me Pretty Living
 DIY Bike Basket from francois et moi
 DIY Kraft Gift Boxes from The Pink Wings
 Ginkgo Leaf Earrings from Wellnesting
Hope you find one or more of these DIY's useful to try. I wish I had more time to do them all. Have a great weekend!
Follow Lovely Clusters On:
Pinterest | Twitter | Instagram | Subscribe -
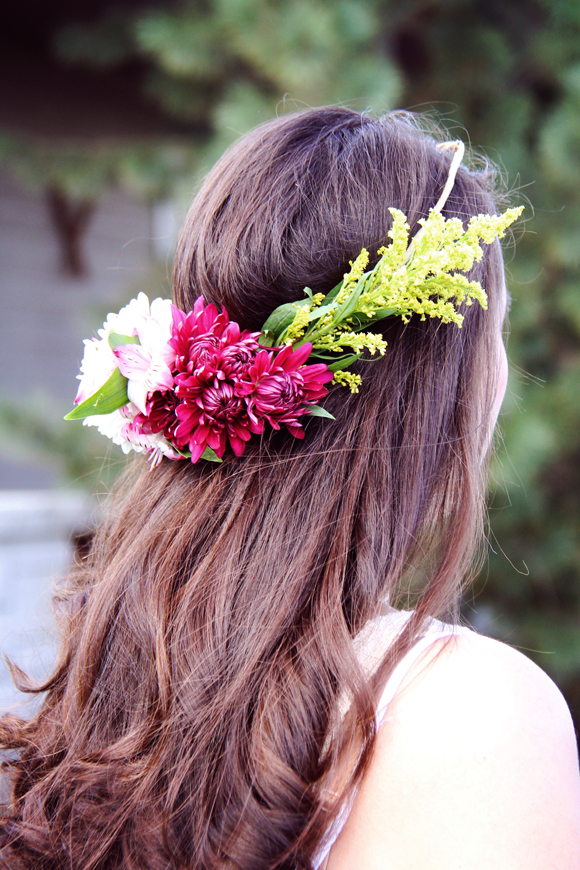
Since it is the lovely time of Spring I thought it would be nice to create a pretty floral crown. This is such a great project because you can use your own creativity and choose your favorite flowers to wear. Plus wearing your new flower crown will make you want to go to a Renaissance Fair or a Music Festival. :)

I picked up a small bouquet of flowers for $3.99 from Trader Joe's and a few supplies from Michael's.
You will need:
- Stem Wire
- Floral Tape
- Wire Cutter
- Green Wire
- Flowers
 Step 1: Pick up two pieces of your stem wire and measure around your head and then twist it where you want it. You can twist it together at the end to make a better fit once the flowers are on it.Step 2: Trim your flowers and get rid of any leaves you don't want to use.
 Step 3: Play around with your flowers to get a direction on how you want it to come out.Step 4: Gather your flowers in small bunches and use floral tape to wrap them together.
Step 5: Use the green wire to wrap your bunches together.
Step 6: Wrap over the wire with floral tape.
Continue step 5 and 6 until you have used up all your bunches and you should get something like this!


Follow Lovely Clusters On:
Pinterest | Twitter | Instagram | Subscribe -


I took these photos on a beautiful Spring day near Smith Rock in Central Oregon. I really love the blue and pink together and how some flowers blurred more than others. You can now download this for your desktop, ipad, or phone background. I hope you find joy in looking at these pretties as much as I do.

* ALL FILES AND PRINTS ARE FOR PERSONAL USE ONLY *
Follow Lovely Clusters On:
Pinterest | Twitter | Instagram | Subscribe -

My new wonderful assistant came across this DIY where you can dye eggs very easily with silk, water and vinegar and we both thought it was such a neat idea! The best part is unwrapping the fabric to see how they all came out. Its pretty fun and quite simple.

You will need:
- 100% silk fabric
- Lightcolored Cotton fabric
- String
- White eggs
- Vinegar
- Pot for boiling
Step 1: Cut 9"x9" silk fabric to cover egg and use string or twist ties to hold it in place. Make sure they are tightly tied on but be gentle enough to not break the egg. (I broke two!) Spritz water on egg to help the fabric stick to it. Make sure you use the more pigmented side of the silk.
Step 2: Wrap eggs with cotton fabric 9"x9" and use string to tie it on.
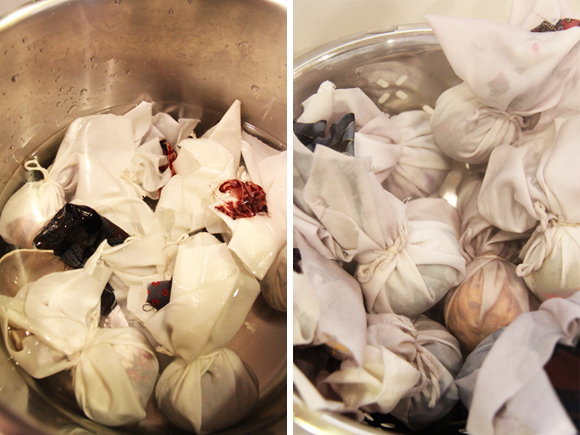
Step 3: Add water in pot and place eggs in gently. Add 1/4 cup of vinegar. Bring to a boil and then put timer on for 20 minutes.
Step 4: Place eggs gently in a colander and let cool.
Step 5: Unwrap fabric from eggs and discover how beautiful they came out!


Follow Lovely Clusters On:
Pinterest | Twitter | Instagram | Subscribe -


I recently came across Jenna Park's story on Steller on how to dye eggs using natural colors and was instantly inspired to make my own! I ended up using blackberries for bluish purple, beets for reddish pink, and turmeric for yellow. I originally wanted to make green with spinach but it didn't quite work out. I read that you need to use frozen spinach and baking powder to make it work. I ended up using turmeric instead.
You will need:
- White Eggs
- 2 Cups Blackberries
- 2 Beets
- 1/4 Cup Turmeric
- Plastic Cups
- White Vinegar
- Spoon
- Napkins
Step 1: Peel and grade two beets
Step 2: Blend the blackberries
Step 3: Add the two graded beets to 4 cups boiling water, add 1/4 cup turmeric to 4 cups boiling water, and add 2 cups blackberries to 4 cups boiling water.
Step 4: Boil for 15 minutes

Step 5: Boil eggs for 12 minutes and then let them cool before adding them to dye
Step 6: Add 1/4 teaspoon of white vinegar to plastic cups
Step 7: Add strained beets, blackberries, and turmeric to the plastic cups
Step 8: Add eggs to cups
Step 9: Let the eggs sit in cups overnight
 Step 10: In the morning dry your eggs off with a paper towel and now you have some pretty naturally dyed eggs!


Follow Lovely Clusters On:
Pinterest | Twitter | Instagram | Subscribe
Subscribe to:
Posts (Atom)